
How to Stop Analysis Paralysis and Find Trades Fast
The Disease: Drowning in Noise While Opportunities Pass You By
You have 15 browser tabs open. RSI on one screen. MACD on another. Bollinger Bands on a third. A custom TradingView indicator your friend coded for you. Twitter/X open to "check sentiment." Discord with 5 different trading servers.
And you still haven't taken a trade.
Analysis paralysis isn't about being bad at analysis. It's about having TOO MUCH analysis and zero filtering. You're drinking from a firehose of data and wondering why you're not thirsty -- you're actually drowning.
Here's the fix: a systematic approach that cuts through the noise using Kingfisher's automated scanning tools, so you spend your time EXECUTING trades, not analyzing them to death.
The Problem With "More Analysis"
Why More Indicators = Worse Decisions
Every indicator you add creates a new requirement for confirmation:
- RSI says overbought? Check MACD.
- MACD says bullish? Check volume profile.
- Volume looks good? Verify with order flow.
- Order flow confirms? Better check funding rate.
- Funding looks extreme? Maybe wait for mean reversion.
By the time all 12 indicators align, one of two things has happened:
- The move is over (you missed it)
- The indicators are conflicting (you're paralyzed again)
The paradox: Traders who analyze more often earn less. They're always "waiting for more confirmation" while the traders who use 2-3 signals and execute consistently are taking profits (and losses) and building a track record.
What the Pros Do Differently
Professional traders don't use fewer tools because they're lazy. They use fewer tools because each tool has a specific job, and they know which jobs matter.
Amateur approach: Collect indicators like Pokemon cards. Use all of them. Hope they agree.
Pro approach: Build a system with 2-3 non-correlated signals. When X and Y both say "go," you go. When they disagree, you stay out. Simple. Fast. Executable.
The Kingfisher Solution: Let the Tools Hunt For You
Tool #1: Momentum Scanner (The Opportunity Finder)
Instead of manually scanning 500 coins every morning looking for setups, let the Momentum Scanner do it:
What it does: Monitors volume AND price changes across ALL markets simultaneously. Flags assets that meet YOUR criteria.
How to set it up (one-time):
- Minimum volume filter: $10M+ daily (adjust for your tier)
- Price change threshold: 8%+ (or whatever your minimum move is)
- Time window: 1 hour, 4 hours, or 24 hours
- Market cap range: Filter out micro-caps if you want
What it shows you:
- Hot picks: Unusual volume + price action catching attention
- Trending: Steady momentum in one direction (your bread-and-butter)
- Breakouts: Volume spike with price breaking level
- Dumps: Heavy selling pressure (short candidates)
Time saved: 2+ hours per day of manual scanning → 30 seconds of reviewing scanner output.
Tool #2: Overbought/Oversold Matrix (The Contrarian Finder)
What it does: Shows RSI extremes across multiple assets and timeframes at a glance. Heatmap format.
How to read it:
- Oversold (RSI < 30): Potential bounce candidates. Red zones = deeply oversold
- Overbought (RSI > 70): Potential short/reduction candidates. Green zones = extended
- Cross-timeframe agreement: Same asset oversold on 1H AND 4H? Stronger signal than single timeframe extreme.
Why it matters: Most CT is chasing whatever is overbought RIGHT NOW. The Matrix shows you what's OVERSOLD -- the contrarian opportunities that everyone else is ignoring because they're too busy buying the top-trending coin.
Tool #3: Liquidation Map Integration (The Edge Layer)
This is where most scanners fail and where Kingfisher separates itself from every basic screener:
The workflow:
- Scanner flags an oversold coin (Matrix highlight)
- You pull up that coin's LiqMap -- are there clusters nearby?
- Two scenarios:
Scenario A (Clean): No major clusters near current price. The oversold condition can play out cleanly. Standard entry.
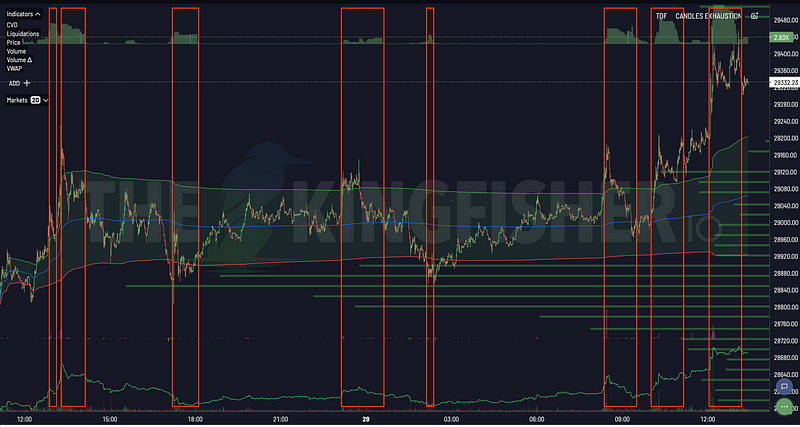
Scenario B (Cluster trap): Massive long cluster sitting just below current price. The "oversold" bounce might be a fakeout before price drops into the cluster and cascades. Skip or size down significantly. This is why combining the scanner with the LiqMap is so powerful -- it filters out traps that look perfect on surface-level indicators. - Check ToF: Is toxicity elevated? If yes, manipulation might be creating the "oversold" reading. Wait for ToF to normalize.
This three-layer filtering (scanner → LiqMap → ToF) takes maybe 5 minutes and gives you higher-probability setups than 4 hours of manual chart-staring ever will.
The 5-Minute Trade Finding Process
Step 1: Open Scanner (30 seconds)
Your criteria should already be configured. Just open the dashboard and review flagged items.
What you're looking for:
- Assets with unusual volume/price activity
- Coins showing momentum in either direction
- Anything breaking out of ranges or hitting extremes
Step 2: Check O/S Matrix (2 minutes)
For each scanner flag, glance at the Overbought/Oversold Matrix:
- Is this asset at an extreme?
- Does it agree across timeframes?
- Is the extreme getting MORE extreme (momentum building) or normalizing (exhaustion)?
Quick filter: If an asset is overbought on multiple timeframes AND the scanner flagged it as "trending up," skip it. That's a chase setup, not a trade.
Step 3: Pull LiqMap (1 minute)
For the 1-3 best-looking scanner hits:
- Are there liquidation clusters near current price?
- Would your stop be inside a danger zone?
- Is there a cluster on the OTHER side that could serve as target?
Decision matrix:
- Clean setup (no clusters interfering) → Proceed to entry
- Cluster risk near stop → Reduce size or skip
- Cluster on target side → Even better setup (fuel for your exit)
Step 4: Confirm with ToF (1 minute)
Quick ToF check on your chosen pair:
- Toxicity under 40? Clean market. Good to go.
- Toxicity 40-60? Acceptable but tighten stops.
- Toxicity 60+? Either great counter-trade opportunity OR stay out. Don't FOMO into a toxic environment.
Step 5: Execute (30 seconds)
Entry. Stop-loss. Target. Done.
Total elapsed time: ~5 minutes from opening scanner to executing trade. Alternative (no good setup found): Close tabs. Go do something else. Come back in a few hours. The market will still be here.
Real Results: From Overwhelmed to Systematic
Before This Approach
- Hours spent analyzing, zero trades taken
- Constant FOMO ("everyone else is making money except me")
- Taking random trades out of frustration
- Emotional exhaustion from decision fatigue
After This Approach
- 5 minutes to find opportunities or confirm there aren't any worth taking
- Clear entry/exit on 2-3 high-quality setups per day MAX
- Confidence comes from process, not gut feeling
- Mental energy preserved for execution, not analysis
The math: Two well-researched trades with proper risk management beat ten guesswork trades every day of the week. Quality over quantity. Always.
Advanced: The Synergy Setup (When All Tools Align)
For maximum edge, combine all four layers:
- Momentum Scanner finds the candidate (unusual activity detected)
- O/S Matrix confirms the timing (extreme reading, multi-timeframe agreement)
- LiqMap validates the structure (clean path to target, no cluster traps)
- ToF confirms clean market conditions (manipulation not active)
When all four align: This is your highest conviction trade of the day. Size it appropriately (still 1-2% max risk), execute with confidence, and let the structure work.
When tools conflict: Skip. There will be other setups. Forcing trades when data conflicts is guessing disguised as analysis.
Common Scanner Mistakes
Mistake #1: Chasing Every Flag
The scanner flags 15 coins. You try to trade all of them.
Fix: The scanner is a FILTER, not a todo list. Pick the top 2-3 that also pass your O/S and LiqMap checks. Ignore the rest. Missing a trade costs less than entering a bad one.
Mistake #2: Ignoring Timeframe Context
Scanner flags a coin based on 1-hour momentum. You enter without checking the 4H trend or daily structure.
Fix: Always verify scanner signals against higher timeframes. A 1-hour breakout into a daily downtrend is usually a trap, not an opportunity.
Mistake #3: Not Updating Criteria
Market conditions change. What worked last month might not work this month. Volatility regimes shift. Bull markets behave differently from bear markets.
Fix: Re-evaluate your scanner thresholds monthly. During low-vol periods, lower your volume/price change minimums. During high-vol periods, raise them (but expect more false signals).
FAQ
Q: How long should I spend analyzing before I'm allowed to take a trade? A: Set a hard maximum of 15 minutes per setup analysis, period. If you can't decide in 15 minutes, the setup isn't clear enough -- skip it. The traders who overanalyze spend 45 minutes on a single chart, talk themselves in and out of the trade three times, and either miss the entry entirely or enter at the worst possible moment (emotionally exhausted from deliberation). The 5-minute framework in this guide (Scanner -> O/S Matrix -> LiqMap check -> TOF confirm) is designed specifically to force fast decisions with sufficient data. Speed of decision matters as much as quality when markets move 24/7.
Q: What if the scanner flags zero setups for an entire day? A: That's normal and it's OK. Not every day has high-probability setups. Forcing trades on slow days is how accounts bleed to death through commissions and bad fills. The correct response: use the downtime productively. Review yesterday's trades. Update your journal. Backtest a new idea. Refine your scanner thresholds. A day with zero trades but +0% P&L is infinitely better than a day with three forced losers at -1.5% each. Professional traders often take ZERO trades multiple days per month. Amateurs feel compelled to trade every session regardless of setup quality.
Q: How does Kingfisher's scanner actually work to find opportunities? A: The momentum scanner monitors all tracked assets continuously and flags when specific conditions are met: unusual volume spikes (3x+ average), significant price moves (>2% in short window), OI changes exceeding threshold, or TOF anomalies indicating aggressive flow. You set the sensitivity thresholds based on your style (conservative = fewer but higher-quality flags; aggressive = more flags but more noise). The scanner is a FILTER, not a signal generator -- it tells you "something worth looking at happened here" but you still run it through your O/S matrix and LiqMap validation before trading. Think of it as a triage nurse, not a surgeon.
Q: What's the minimum number of confirming signals I need before pulling the trigger? A: Three aligned signals minimum for standard size (1-1.5% risk). Two signals = reduced size (0.5-1%) or wait. One signal = skip entirely. The four-signal stack that defines highest conviction: (1) Scanner flagged the asset (anomaly detected), (2) O/S Matrix shows favorable reading (not extreme against you), (3) LiqMap shows clean cluster setup (target cluster exists, no clusters between entry and stop), (4) TOF/CVD confirms flow direction (smart money moving your way). When all four align, that's your best trade of the day. Size it appropriately and execute with confidence. When they conflict, no trade. Forcing it when data fights itself is guessing disguised as analysis.
Q: Can this fast-decision framework actually work for someone who's naturally analytical and detail-oriented? A: Yes, but it requires explicit process discipline. Analytical personalities tend to keep researching indefinitely because there's always one more data point to check. The fix isn't changing your personality -- it's building external constraints: set a timer for 15 minutes max per setup, predefine your checklist items (no adding new ones mid-analysis), and commit to the rule that timer expiration = automatic skip unless you've already decided. Analytical depth is an asset in BACKTESTING and journal review (where time pressure doesn't exist). It's a liability in live execution where opportunity windows close. Channel your analytical nature into post-trade review, not pre-trade paralysis.
Bottom Line
Analysis paralysis kills more trading accounts than bad analysis ever did. The trader who takes 5 decent setups per week with proper risk management will outperform the trader who analyzes 500 charts perfectly and takes zero trades.
Kingfisher's tools don't add to your analysis paralysis -- they eliminate it by doing the heavy lifting automatically. Scanner finds opportunities. Matrix filters timing. LiqMap validates structure. ToF confirms cleanliness.
Your job is to execute the final step. Everything before that is preparation. Do the prep fast, then pull the trigger. Or don't, and save your capital for when the setup is actually there.
Find Your Next Trade in Minutes -- Start Free — See All Kingfisher Features
Related: For deeper dives into individual tools, read our liquidation maps guide, Toxic Order Flow primer, or beginner's guide.
Related Articles
Transformieren Sie Ihre Krypto-Strategie – Nutzen Sie die umfassende Marktintelligenz von The Kingfisher!
Glossar
Lernen Sie die wichtigsten Begriffe und Konzepte aus unserem umfassenden Krypto-Trading-Glossar.
Glossar durchsuchen →Ähnliche Artikel

How to Interpret the Leverage Effect in Crypto Markets
The leverage effect explained: why negative returns create more volatility than positive ones, how chain liquidations work, and what Kingfisher's data tells you about leverage risk.

Getting Started on The Kingfisher: Stop Being Exit Liquidity
What problem does Kingfisher solve? See how liquidation maps reveal where price will go BEFORE it moves there. Stop getting hunted by whales. Start trading with an edge in 10 minutes.
Toxic Order Flow Bitcoin: Detect Market Manipulation in Real-Time
Stop being exit liquidity. Learn how toxic order flow (TOF) reveals when whales are hunting retail traders. Practical guide with step-by-step interpretation and trading strategies.

Options Skew Templates for Perp Traders: Complete Guide to Using Skew Data on Kingfisher
Master options skew data for perpetual futures trading. Learn how to read and use Skew templates on Kingfisher, understand different template types (Basic, Vanilla, Premium), when each template works best, and how to combine skew analysis with LiqMap confirmation for high-probability crypto trading setups.