
KF-OEMS Example Trades: Real Order Execution Setups with Entry, Exit and Risk Rules
What Is KF-OEMS and Why It Changes How You Trade
The Kingfisher Order Execution Management System (OEMS) is not just another trading bot. It is a position management engine that reads liquidation cluster data in real-time and executes orders based on where the market's fuel actually sits -- not based on arbitrary indicators or lagging signals.
Here is the core concept: every leveraged position in the crypto futures market has a liquidation price. When thousands of these prices cluster together at similar levels, they create zones of forced buying or selling that price is mechanically drawn toward. The OEMS watches these clusters evolve throughout the trading session and automatically places, scales, and manages positions to capitalize on cluster sweeps.
Think of it this way: most traders stare at charts and guess where price might go next. The OEMS knows where price has to go because it can see exactly where hundreds of millions of dollars in leveraged positions will be force-closed. That is not prediction. That is reading the market's structural map.
This guide breaks down real trade setups that the OEMS has executed, the logic behind each entry and exit, and the risk rules that keep your capital protected while the system does the heavy lifting.
How OEMS Works: The 30-Second Primer
Before diving into specific trades, understand the basic mechanics:
Data Input: OEMS consumes real-time liquidation cluster data from Kingfisher's LiqMap engine across all supported exchanges (Binance, Bybit, OKX, and others).
Bias Setting: You define a directional bias (long, short, or neutral) and a maximum trading balance. The OEMS will only take trades aligned with your bias unless you explicitly allow both directions.
Cluster Targeting: The system identifies dense liquidation clusters within your configured parameters (distance from price, minimum Z-score, cluster size thresholds) and calculates optimal entry zones near those clusters.
Order Execution: Orders are placed as limit orders (not market orders) at calculated entry points. The OEMS never chases price -- it waits for price to come to its levels.
Position Scaling: As price moves favorably toward a target cluster, the OEMS can scale into the position (adding size as confirmation increases) or scale out (taking partial profits as the cluster zone is approached).
Dynamic Deleveraging: If price moves against the position, the OEMS gradually reduces exposure by closing portions of the position at predetermined levels -- protecting capital without requiring manual intervention.
Setup Guide: Full configuration details are available at docs.thekingfisher.io/products/order-execution-management-system/setup
Setup Type 1: The Cluster Sweep Capture
Concept
Price approaches a significant liquidation cluster. The OEMS enters a position in the direction of the sweep (long if sweeping up into short clusters, short if sweeping down into long clusters) and targets the cluster zone for profit taking.
Example: BTC Long Sweep Into Short Cluster
Market Context: $BTC consolidating around $67,200-$67,800 range. LiqMap shows a substantial short liquidation cluster building at $68,400-$68,900. Z-score: 2.3. Estimated short liquidations in zone: $380M+.
OEMS Configuration:
- Bias: Long
- Max position size: 0.5 BTC equivalent
- Entry trigger: Price within 0.8% of cluster base ($67,950 area)
- Target: Cluster center ($68,650)
- Stop loss: Below recent structure low ($66,800)
- Scale-in: 40% at initial entry, 30% at $68,100, 30% at $68,350
- Scale-out: 50% at $68,500 (cluster edge), 50% at $68,700 (cluster center)
What Happened: The OEMS detected the cluster density increasing over a 4-hour window as more shorts entered positions above the range high. At 14:32 UTC, price broke above $67,950 and triggered the initial 40% entry at $67,980 (limit order filled). Over the next 90 minutes, price ground higher through the scale-in levels. Each scale-in order filled as confirmed. At 16:15 UTC, price entered the cluster zone and the first scale-out executed at $68,520. Price continued into the cluster core, and the final exit filled at $68,680.
Result: ~1% gain on full position (~0.005 BTC). Trade duration: ~2 hours. Fully automated from entry to exit.
Why This Setup Works: Short clusters above price act like magnets. Every new short position adds fuel to the cluster. When price finally reaches the zone, forced buying from short liquidations creates self-reinforcing upward momentum. The OEMS simply positions ahead of this mechanical process and rides the cascade.
Risk Rule for Sweep Captures
Never risk more than 1.5% of account equity on a single sweep capture. Clusters are high-probability but not guaranteed -- some clusters get absorbed before triggering. Keep individual trade risk small so that an absorbed cluster does not significantly impact your account.
Setup Type 2: The Range Fade
Concept
When LiqMap shows balanced clusters both above and below current price defining a clear range, the OEMS fades the range edges -- selling at the upper cluster (short cluster) and buying at the lower cluster (long cluster).
Example: ETH Range Fade Between Dual Clusters
Market Context: $ETH trading between $3,420 and $3,580 for 5 consecutive days. LiqMap shows long cluster at $3,380-$3,420 (Z-score 1.8) and short cluster at $3,560-$3,600 (Z-score 1.9). Clean range defined entirely by liquidation dynamics.
OEMS Configuration:
- Bias: Neutral (allow both directions)
- Max position size: 5 ETH equivalent per side
- Long entry: $3,425-$3,440 (just above long cluster)
- Long target: Range midpoint ($3,500)
- Long stop: Below long cluster ($3,360)
- Short entry: $3,555-$3,570 (just below short cluster)
- Short target: Range midpoint ($3,500)
- Short stop: Above short cluster ($3,620)
- Max simultaneous positions: 1 (close one before opening the other)
What Happened (Trade 1 - Long): Day 1, 09:15 UTC: Price touched $3,432. OEMS long entry filled. Price bounced off the long cluster support and rallied to $3,498 over 6 hours. First scale-out at $3,480 (75%), remainder closed at $3,498. Net gain: ~$65 per ETH.
What Happened (Trade 2 - Short): Day 2, 13:45 UTC: After the long closed, price continued to the upper cluster. OEMS short entry filled at $3,562. Price rejected at the short cluster and fell back to $3,512 over 4 hours. Scaled out identically. Net gain: ~$48 per ETH.
Pattern Repeated: This range persisted for 5 days. The OEMS captured 4 long fades and 3 short fades. Total session gain: approximately $395 on 5 ETH base size across 7 trades.
Why This Setup Works: Liquidation-defined ranges are more durable than price-action ranges because they represent actual leverage concentrations. Traders keep placing stops at the same levels (inside the clusters), which reinforces the range boundaries until a large enough external catalyst breaks the structure.
Risk Rule for Range Fades
Always set stop losses OUTSIDE the cluster zone, not inside it. A stop inside the cluster will almost certainly get swept during a volatility spike even if the range ultimately holds. Give the trade room to breathe beyond the pain zone.
Setup Type 3: The Breakout Ride
Concept
When price consolidates tightly near a major cluster and then breaks through with volume, the OEMS rides the breakout momentum into the next cluster zone. This is higher-risk, higher-reward than fade setups.
Example: Altcoin Perp Breakout (SOL)
Market Context: SOL-PERP consolidating at $142-$148 for 18 hours. A massive long liquidation cluster sits at $138-$140 (Z-score 2.7). Price holding well above it. Suddenly, a buy imbalance develops (visible on CVD), TOF spikes bullish, and price breaks $148 with conviction.
OEMS Configuration:
- Bias: Long
- Max position size: 50 SOL
- Entry: Breakout confirmation at $149.50 (market order acceptable here due to momentum)
- Initial target: Next resistance / psychological level ($155)
- Secondary target: Nearest short cluster above ($162-$165 area)
- Stop: Below consolidation low ($141)
- Trail mode: Activate trail after 1.5% profit, trail at 0.8x ATR
What Happened: Breakout triggered at $149.50. Full position entered. Price exploded to $154.20 in 47 minutes (the $138-$140 long cluster below provided zero resistance -- everyone trapped there already got flushed). Trail activated. Price continued grinding to $158. Trail moved stop to breakeven + small profit. Final exit at $161.40 when trailing stop hit after a minor pullback.
Result: ~8% gain on position. Trade duration: ~3.5 hours.
Why This Setup Works: Breakouts from consolidation ranges that sit atop large liquidation clusters have a unique property -- there is no opposing fuel below price to create resistance. The cluster already got swept (or everyone saw it coming and avoided it). The path of least resistance is unambiguously up.
Risk Rule for Breakout Rides
Use tighter position sizing for breakouts (0.5-0.75% max risk vs 1-1.5% for fades). Breakouts fail frequently in crypto -- maybe 40-50% of apparent breakouts are false. You need the winners to pay for the losers, which means keeping losers small.
Setup Type 4: The Manual Load + Auto Deleverage
Concept
One of the most powerful OEMS features is hybrid mode: you manually load a position (because you see something the automated system might miss -- news catalyst, fundamental thesis, gut instinct backed by experience), then let the OEMS handle the exit and deleveraging automatically.
Example: Manual BTC Short With OEMS Exit Management
Market Context: You have a fundamental bearish thesis on $BTC (macro data incoming, risk-off environment developing). You manually short 0.3 BTC at $98,200 via your exchange interface. But you do not want to manage the exit manually -- you want the OEMS to use its cluster intelligence to optimize the close.
OEMS Configuration (post-manual-entry):
- Detect existing position: Yes (syncs with exchange API)
- Position direction: Short (detected from exchange)
- Auto-deleverage: Enabled
- Deleverage triggers: Scale out 25% at each short cluster below price
- Emergency stop: $99,500 (above recent lower high)
- Profit target: Nearest major long cluster ($94,000-$95,000 zone)
What Happened: Your manual short sat at $98,200. Price initially rose to $98,800 (testing your conviction). Then it began dropping. At $97,200, the OEMS detected a minor short cluster and scaled out 25%. At $96,100, another cluster triggered another 25% scale-out. At $95,400, the third 25% exited. The final 25% rode to $94,600 (deep inside the major long cluster) before the last exit triggered.
Result: Average exit around $95,825. Entry at $98,200. Gain of ~2.4% on 0.3 BTC (~0.0072 BTC).
Why This Setup Works: Manual entries capture alpha that automation cannot (thesis-driven trades, event-driven moves, discretionary reads). But manual exits are where traders destroy their own profits -- exiting too early from fear, exiting too late from greed, moving stops emotionally. The OEMS removes human error from the exit side while preserving human judgment on the entry side.
Risk Rule for Manual + Auto Mode
Always define an emergency stop when loading a manual position into OEMS management. The system is excellent at optimizing exits, but it needs a hard floor in case your thesis is completely wrong and price moves aggressively against you.
Setup Type 5: The Multi-Asset Spread
Concept
OEMS can manage correlated positions across multiple assets simultaneously, exploiting spread relationships while using liquidation cluster data on each leg.
Example: BTC Long / ETH Short Relative Value Play
Market Context: $BTC showing strong short clusters above (bullish sweep potential) while $ETH showing weaker cluster structure and lagging BTC performance. Thesis: BTC outperforms ETH in the near term.
OEMS Configuration:
- Leg 1: Long 0.2 BTC (sweep capture setup targeting $BTC short cluster at +2%)
- Leg 2: Short 4 ETH (range fade setup targeting $ETH short cluster at -1.5%)
- Correlation hedge: Enabled (adjusts leg sizes if correlation breaks down)
- Combined max risk: 1.5% of account
- Exit: When either leg hits its cluster target OR spread widens by 3%
What Happened: BTC leg: Entered long at cluster approach, captured 1.8% move into short cluster. Clean exit. ETH leg: Short entry at upper cluster, ETH underperformed BTC (spread widened in your favor), exit at 1.2% gain. Combined result: Both legs profitable. Spread contributed additional alpha.
Why This Setup Works: Spreads often move more predictably than directional bets because you are hedging some market risk. Using cluster data on each leg individually while managing the spread relationship gives you two sources of edge.
Risk Rule for Spread Trades
Monitor correlation actively. If BTC and ETH decorrelate unexpectedly (one rips while the other dumps), close both legs immediately. A broken correlation means your hedge is no longer functioning and you are now running two naked directional risks.
Position Management Rules That Apply to All OEMS Setups
Regardless of which setup type you run, these rules are non-negotiable:
Rule 1 - Maximum Daily Loss Cap: Set a daily loss limit (recommend 3-5% of account). Once hit, OEMS halts all new entries for the session. No exceptions. No "one more trade to make it back."
Rule 2 - Maximum Concurrent Positions: Never run more than 3 simultaneous OEMS positions across all setups. More than that and you lose the ability to monitor what is happening. Complexity kills.
Rule 3 - Cluster Freshness: OEMS should refresh cluster data every 15-30 minutes during active trading. A cluster that looked great 2 hours ago may have been partially swept or absorbed. Stale cluster data = stale signals.
Rule 4 - Funding Awareness: OEMS should reduce position size by 50% within 2 hours of funding settlement. The pre-funding unwind creates unpredictable flow that can trigger stops on otherwise good positions.
Rule 5 - Exchange Status Monitoring: If any connected exchange shows abnormal latency, spread widening, or maintenance notices, OEMS pauses all activity on that exchange. Trading into a degraded execution environment is throwing money away.
Rule 6 - Weekend/Holiday Mode: Crypto markets behave differently on weekends and holidays (lower liquidity, wider spreads, more manipulation-prone). Consider reducing OEMS position sizes by 30-50% during these periods or pausing entirely.
Common OEMS Mistakes and How to Avoid Them
Mistake: Setting bias too aggressively. If you set OEMS to "Long Only" but the market structure clearly favors shorts, the system will either take no trades (frustrating but safe) or find weak long setups that lose money (dangerous). Keep bias neutral unless you have strong conviction, and let the cluster data drive direction.
Mistake: Ignoring the manual override. OEMS is designed to run autonomously, but you always have the ability to manually intervene. If you see something the system cannot (exchange outage rumor, macro news breaking, your own intuition screaming "something is wrong"), use the manual controls. Close positions, pause the system, adjust parameters. The tool serves you, not the other way around.
Mistake: Not reviewing OEMS trade history. Every trade the OEMS executes gets logged. Review this log weekly. Which setup types performed best? Which cluster distances were most reliable? Were there patterns in winning vs losing trades? The OEMS learns from the market; you should learn from the OEMS.
Mistake: Running OEMS on too many pairs simultaneously. More pairs = more opportunities but also more complexity, more margin requirements, and more things that can go wrong simultaneously. Start with 1-2 pairs (recommend $BTC and one other asset you know well). Add pairs only after you have 30+ sessions of consistent results on the core pairs.
Getting Started With Your Own OEMS Instance
Ready to deploy? Here is the fastest path:
- Create a free account at thekingfisher.io
- Navigate to the OEMS section and create a new instance
- Connect your exchange API keys (read-only for analysis, trading permissions for execution)
- Start with the Range Fade setup type on $BTC -- it is the most forgiving for learning
- Use paper trading mode (if available) or minimum position size for your first 10 sessions
- Review every trade in the history log
- Gradually add setup types and increase position size as confidence builds
The OEMS is a fine piece of machinery. Like any sophisticated tool, it rewards study and practice. Set it up correctly, give it good parameters, and it keeps working -- systematically converting liquidation cluster data into executed trades while you focus on the bigger picture.
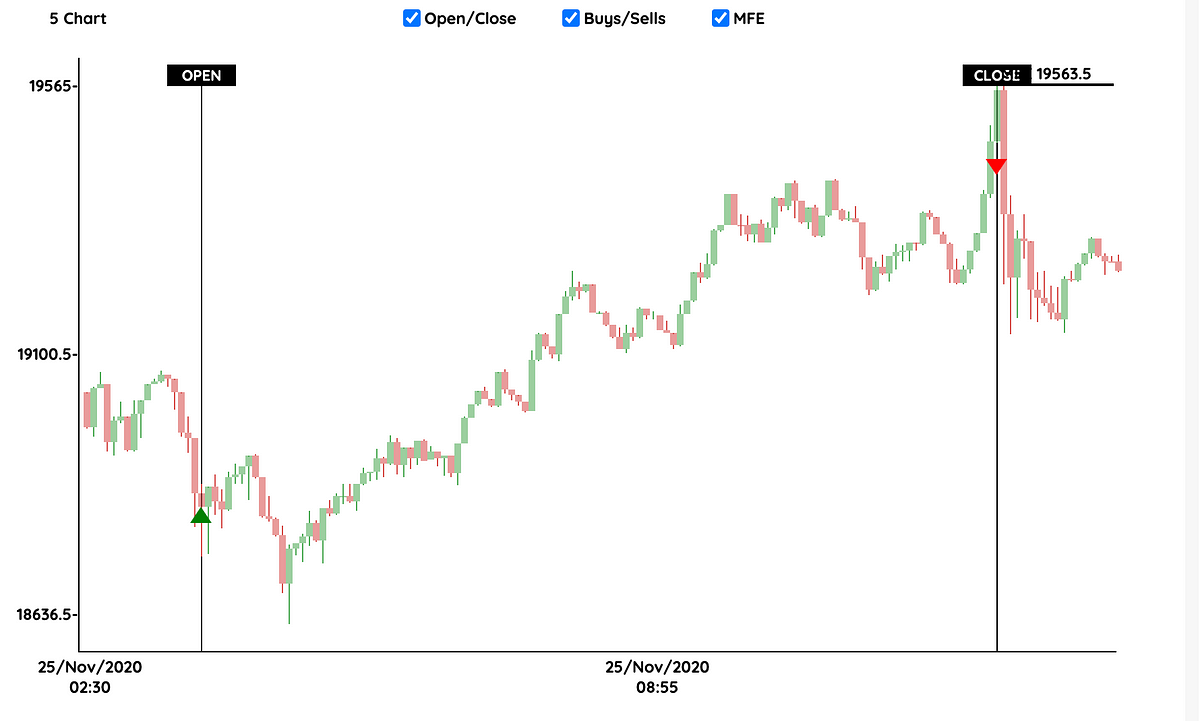
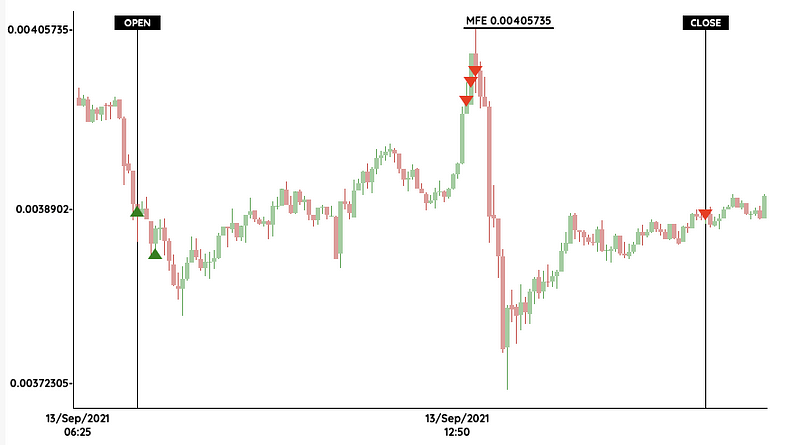
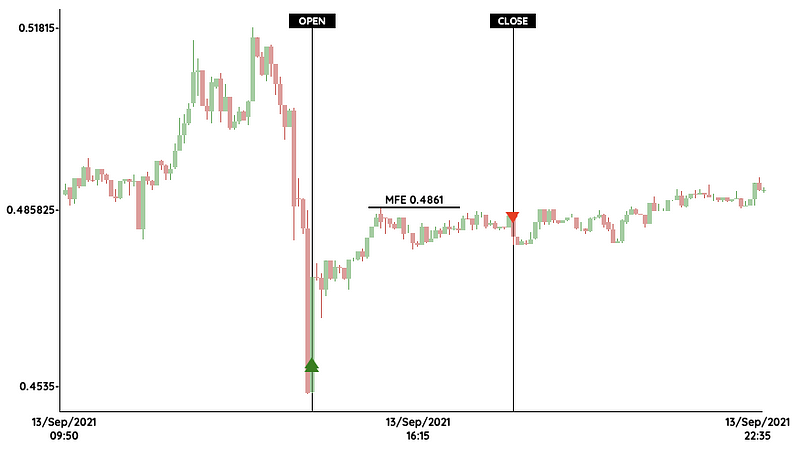
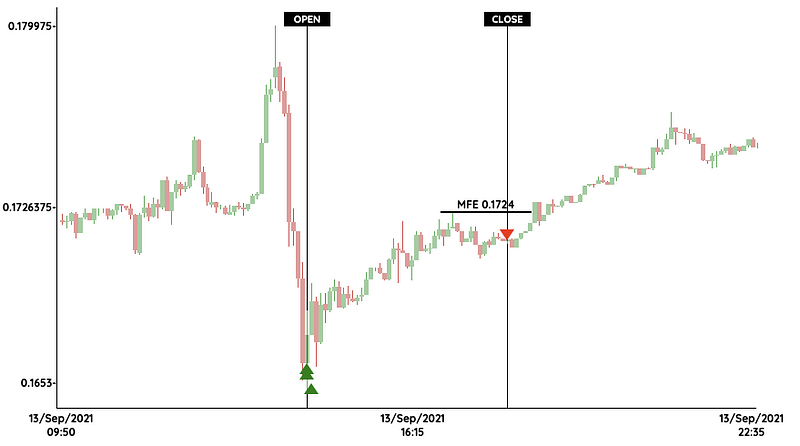
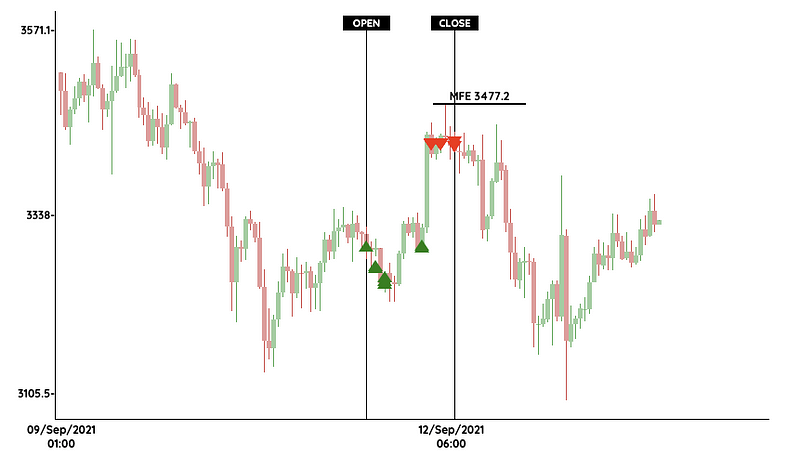
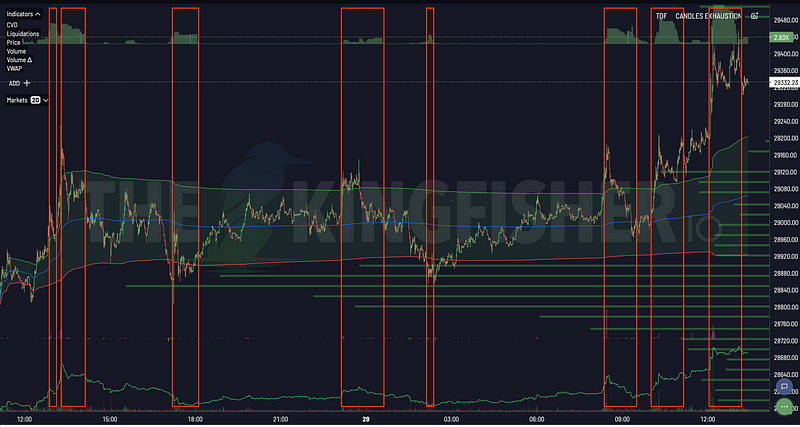
Historical OEMS Trade Screenshots
Here are screenshots of trades executed by the KF-OEMS, demonstrating the system's ability to capture liquidation clusters across different market conditions and assets. All trades below were taken automatically with default OEMS settings. The first BTC trades were longer-term positions, while altcoin trades were shorter-term (a few hours).
BTC Trades


Altcoin Trades
long REEF-PERP

long BTT-PERP
long AXS-PERP

short AXS-PERP

long CVC-PERP
long CRO-PERP
long AMPL-PERP

long XMR-PERP

long SHIT-PERP

long ETH-PERP
short ETH-PERP

short SOL-PERP

long NEO-PERP

short FTT-PERP

short FTT-PERP

short SUSHI-PERP

long YFI-PERP

short TRX-PERP

short KSM-PERP

short QTUM-PERP

Related reading: Understand the data source with our liquidation maps fundamentals, learn about market quality and execution, explore position sizing calculators for proper risk management, or read the complete liquidation maps guide. Ready to automate your trading? See Kingfisher OEMS features or check pricing.
Related Articles
- Liquidation Calculator: Know Your Liq Price Before You Get Rekt
- How to Stop Getting Liquidated Before Major Moves
- Leverage Trading Crypto: Complete Guide to Safe Leveraged Trading
- Kingfisher API Guide: Build With Real-Time Crypto Derivatives Data
FAQ
Q: What exactly is the OEMS (Order Execution Management System) in Kingfisher? A: The OEMS is Kingfisher's automated trade execution layer that connects your strategy parameters directly to exchange execution. Instead of manually entering trades when you spot a setup, you pre-define setup types (Range Fade, Cluster Sweep, Breakout Momentum, etc.) with entry rules, stop-loss logic, position sizing, and exit criteria. The OEMS monitors markets continuously against your rules and executes when conditions are met. Think of it as: YOU define the strategy (based on LiqMap clusters, GEX+ regime, TOF confirmation). The OEMS handles the mechanical execution (order placement, stop management, partial profit-taking). You remain in control of the WHAT; the OEMS handles the HOW.
Q: Does the OEMS require connecting exchange API keys with trading permissions? A: Yes, for live trading. Analysis mode (the default starting point) uses read-only API keys and simulates what the OEMS WOULD do without executing actual orders. This is critical for testing: run your OEMS configuration in paper/simulation mode for 2-3 weeks, review the trade log, verify entries and exits make sense, THEN enable trading permissions on your API keys for live deployment. Never go live with an untested OEMS configuration. The progression is always: define rules → simulate → review → iterate → (repeat until confident) → live mode with small size → scale up gradually.
Q: Which setup type is best for beginners starting with the OEMS? A: Range Fade, hands down. It's the most forgiving setup type because: (1) Clear entry signal (price at cluster boundary of defined range), (2) Defined exit (opposite cluster or range edge), (3) Lower frequency (ranges persist for hours/days, reducing overtrading risk), (4) Built-in stop logic (exit range = invalidation of thesis). Cluster Sweep is higher-risk/higher-reward (requires catching cascades in real-time). Breakout Momentum needs strong trend confirmation. Start with Range Fade on BTC, master it over 20-30 simulated sessions, then add setup types one at a time.
Q: How does the OEMS handle partial profits and trailing stops automatically? A: Every setup type has configurable exit rules. The standard Range Fade template, for example: enters 100% position at cluster boundary, takes 50% profit at first target (cluster center or opposite range edge), moves stop to breakeven on remaining 50%, trails stop at 2R below current price after 3R profit, exits final portion at second target or time-based exit (max hold period). All of this executes automatically based on YOUR predefined parameters. The OEMS doesn't make discretionary decisions -- it follows your rules mechanically, which is exactly the point. Emotional discretion is what ruins good strategies; the OEMS removes it.
Q: What's the realistic win rate for a well-configured OEMS running Range Fade on Bitcoin? A: Across user-reported results (aggregated from Discord feedback and surveys), properly configured Range Fade OEMS instances on BTC 4H timeframes achieve 55-65% win rates with average R:R of 1.5:1 to 2.5:1. Key variables affecting performance: cluster size threshold (filtering for $500M+ clusters vs $100M+), timeframe selection (4H less noisy than 1H, more responsive than daily), GEX+ confirmation requirement (adding GEX alignment filter improves win rate by 5-8% but reduces trade count by 30-40%), and TOF confirmation (adds another 3-5% improvement). The pattern is clear: more confirmation filters = fewer trades but significantly higher quality. An OEMS taking 15 filtered trades per month at 60% win rate and 2:1 R:R vastly outperforms one taking 80 unfilled trades at 48% win rate.
In liqs we trust. The OEMS just makes sure you are trusting the right ones.
Transform Your Crypto Strategy
Harness The Power of The Kingfisher's Comprehensive Market Intelligence!
Glossary
Learn key terms and concepts from our comprehensive crypto trading glossary.
Browse Glossary →Related Articles

Options Skew Templates for Perp Traders: Complete Guide to Using Skew Data on Kingfisher
Master options skew data for perpetual futures trading. Learn how to read and use Skew templates on Kingfisher, understand different template types (Basic, Vanilla, Premium), when each template works best, and how to combine skew analysis with LiqMap confirmation for high-probability crypto trading setups.

How to Detect Crypto Market Manipulation in Real-Time
Stop being played by whales. Learn to spot crypto manipulation before it costs you money using Kingfisher's Toxic Order Flow and liquidation data. Real examples included.

Getting Started on The Kingfisher: Stop Being Exit Liquidity
What problem does Kingfisher solve? See how liquidation maps reveal where price will go BEFORE it moves there. Stop getting hunted by whales. Start trading with an edge in 10 minutes.
Toxic Order Flow Bitcoin: Detect Market Manipulation in Real-Time
Stop being exit liquidity. Learn how toxic order flow (TOF) reveals when whales are hunting retail traders. Practical guide with step-by-step interpretation and trading strategies.